I've updated my process a bit so there are more things to show....
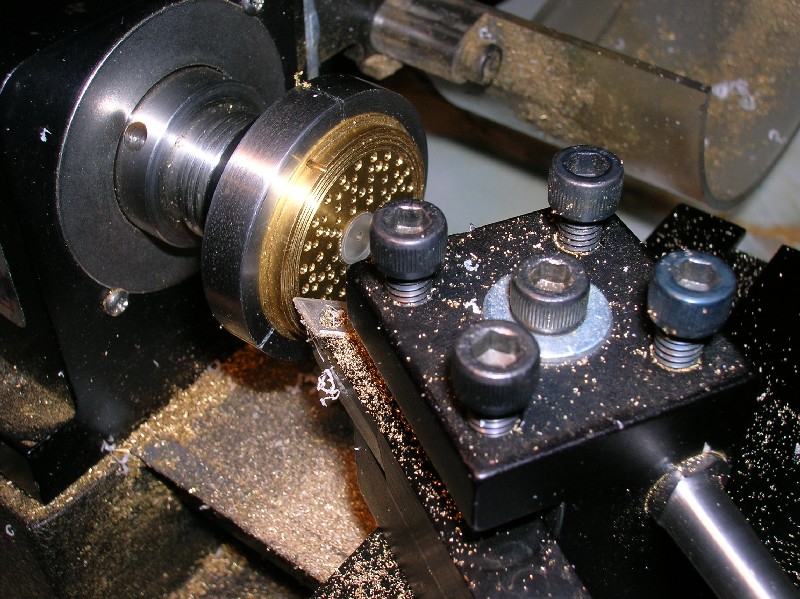
This is a shot of a lathe machining the 'final cut' into a capsule. This is a critical cut - there are features on this cut that must be with about two microns (around a tenth of a thousandth of an inch). The early capsules, and carryover backplates from earlier batches, are machined manually. New production is done with CNC control of the same (Sherline) lathe. I am using a Levin Lathe machinable 8mm collet to hold the part - a normal jaw-equipped chuck will not work.
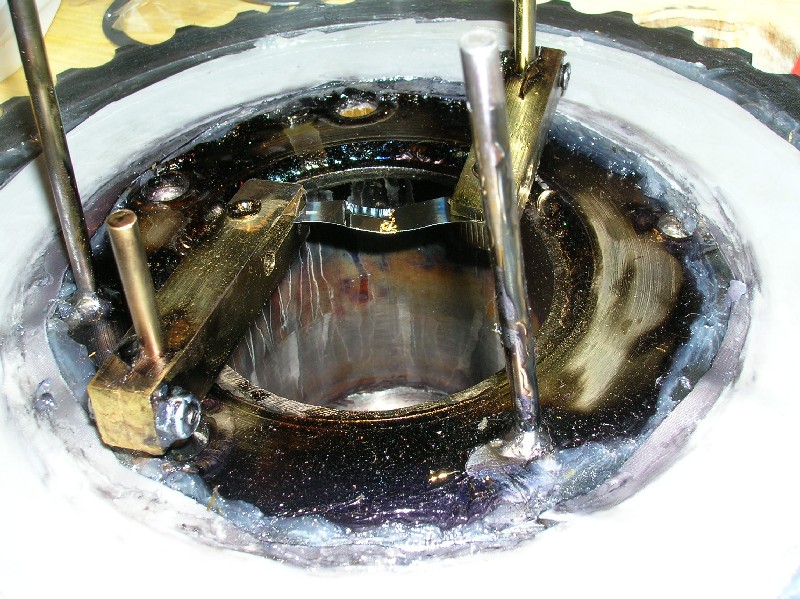
This is underneath the cover of the gold coating machine. The heater filament (commonly called a boat) is shown with a small bit of gold wire in the middle. The boat gets heated to a rather high temperature with a fair bit of electrical current..... the glow you see from below is from the filament.
Here you can see the glow of the filament. Note that the diaphragm you can see looks a bit greenish. That green comes from the cloud of gold that is between the filament and the diaphragm.

Things have to be clean. It is difficult and expensive to create a homebuilt clean-room. So a semi-reasonable alternative which works - but may have a few failures due to dust - is to clean the capsule using clean gas... in this case, that computer duster stuff.

The diaphragm needs to be primed for glue. Mylar does not accept adhesives particularly well, so priming with Loctite 770 primer (meant for difficult-to-adhere plastics and cyanoacrylate adhesives) does the job well here. This is applied to the backside of the diaphragm (the side opposite the gold layer).
After placing the diaphragm on the capsule, a quick check with the air gun is used for two things. Since I am tensioning the diaphragm with a weight and not a special tensioning jig, the evenness of the tension is somewhat important on this mic capsule design. You can hear uneven tension but it actually has a relatively small effect here. On capsules like the K67 and the CK12, this is much more critical. Anyways, the quick air check will spot large (>20%) errors in tension evenness. The other important check is to look for debris that got stuck under the diaphragm. Now is the time to clean it out.
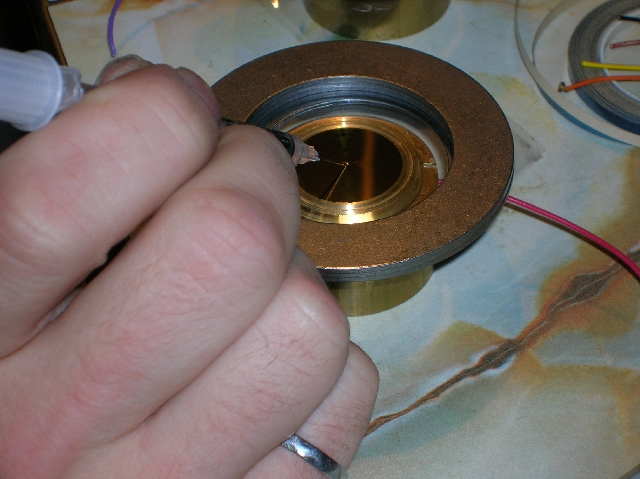
A small hole is made in the middle of the diaphragm with an empty insulin syringe. These are cheap, sharp, needles with a handle built in.
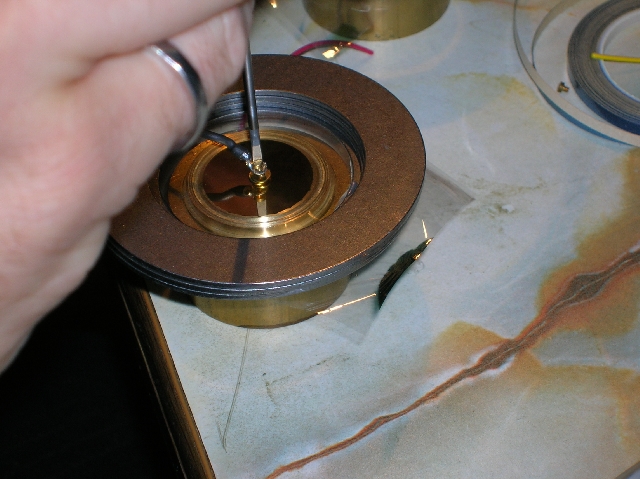
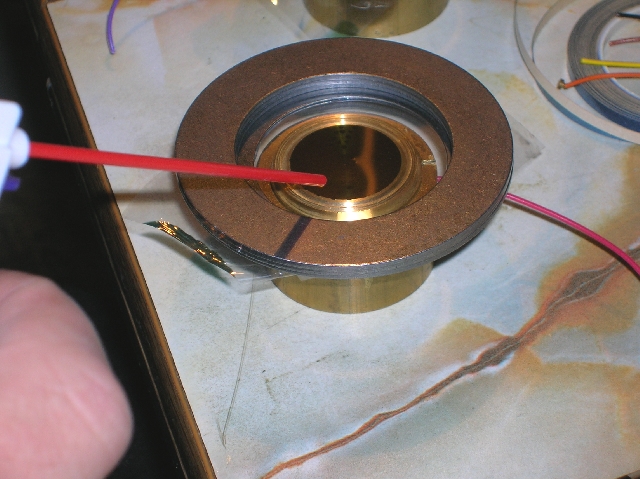
Next, the centre lead is attached with a brass screw. Brass washers are also used under the terminal. Gold plated hardware would be better but this is acceptable. Copper or aluminum hardware can't be used because of corrosion problems.
![]()
The diaphragm clearance is checked before final glue. This is easy, actually. We know the area, we know the materials, we know the capacitance. Calculate the distance from that.... If it's too large (the number is too low on the handy little display), the diaphragm can be removed and the edge lapped down a hair. If it's too high, then there's not much you can do. Sometimes changing the glue method a hair can shift the diaphragm up a tad, but it's risky and usually doesn't work.
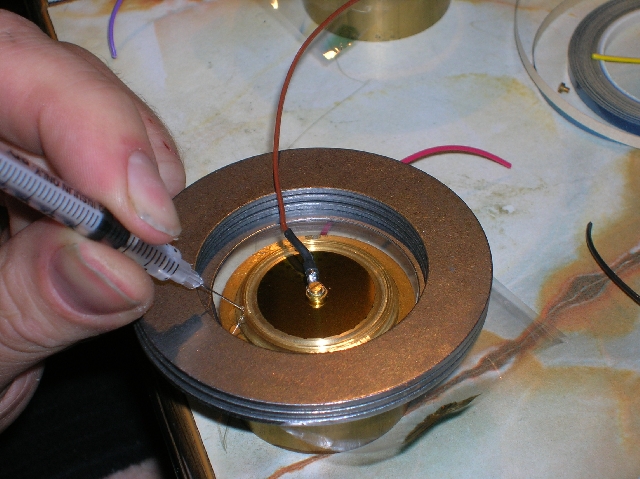
Final step of attaching the diaphragm. This must be what a dentist feels like when doing fillings. Or a neurosurgeon stirring around up there. Anyways, the method I use is to prick the diaphragm in the outer glue ring, drop a single bit of glue on that hole, and just tap the hole a bit with the needle. The glue will draw into the hole and the surface tension will draw it in. Simply add little drops of glue to that spot and it gets drawn in automatically. Once the outer ring is full, that's it. The inner ring is there to capture mistakes, which happen a lot, actually. If you look at a Neumann M7, it has two glue rings. Once is usually empty or has a little bit of glue in there. The Gefell M7's only have one ring. The second ring was an improvement done to increase capsule production yields.
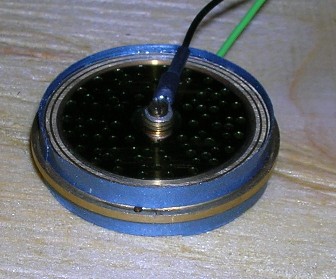
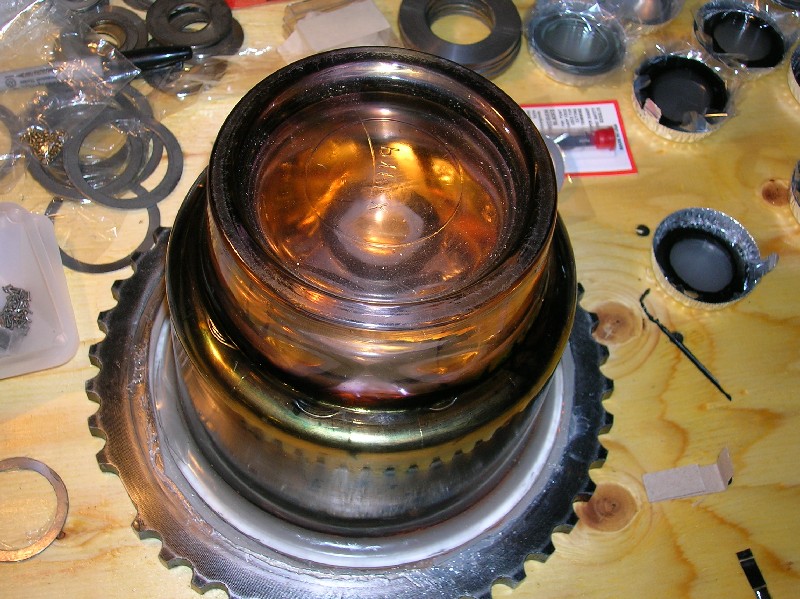
And this is a photo of a completed capsule. Note that I have added the protective rings (blue in this case) to prevent the diaphragm from getting accidentally pulled off. This is a feature shared with the Neumann M7 capsules found in U47's. There is also a very slight effect on frequency response by this ring. The original rings were a clear plastic, however, I wanted to ensure that nobody tried to pawn off one of my capsules as the genuine article, so there are some very slight differences. Any microphone tech should be able to tell the difference.